Viking/Rus Pants
Well I officially pre-registered for Pennsic. I am beyond excited. I pretty much have all of the garb I need. I need one more smock but I would love two. I need one more camp dress, something to toss on to bum around camp. Andy however, has no garb. I have my viking garb so I thought to make some for Andy as well. I decided to take apart my one of my old dresses, it is the same as the blue one I redid. This dress was...bad. I redid the orange one before the blue one and it was just a disaster.


So Andy gets some Rus pants out of it! Yay!
Here is one half of the dress. Most of this is going to become one leg of his pants. The other side of the dress with be the other leg.
Here I missed a bunch of pictures about the top part of the pants. Basically I just cut out two huge rectangles. First I sergered the edges of everything. Andy is not called The Great Destroyer for no reason. Then I sewed the leg rectangle to the right rectangle where the back seam will be. Then I switched to the front. I wanted to put a fly into these because they are a drawstring closure on the waist. I just had visions in my head of him drunk, in a port-a-john at Pennsic with the pants laying in god-only-knows-what on the floor.
So for the fly I sewed the front seam with an overlap of about an inch and a half. At the bottom of the fly I stitched across horizontally to stop the fly. Then, as smoothly as I could I realigned the seam.
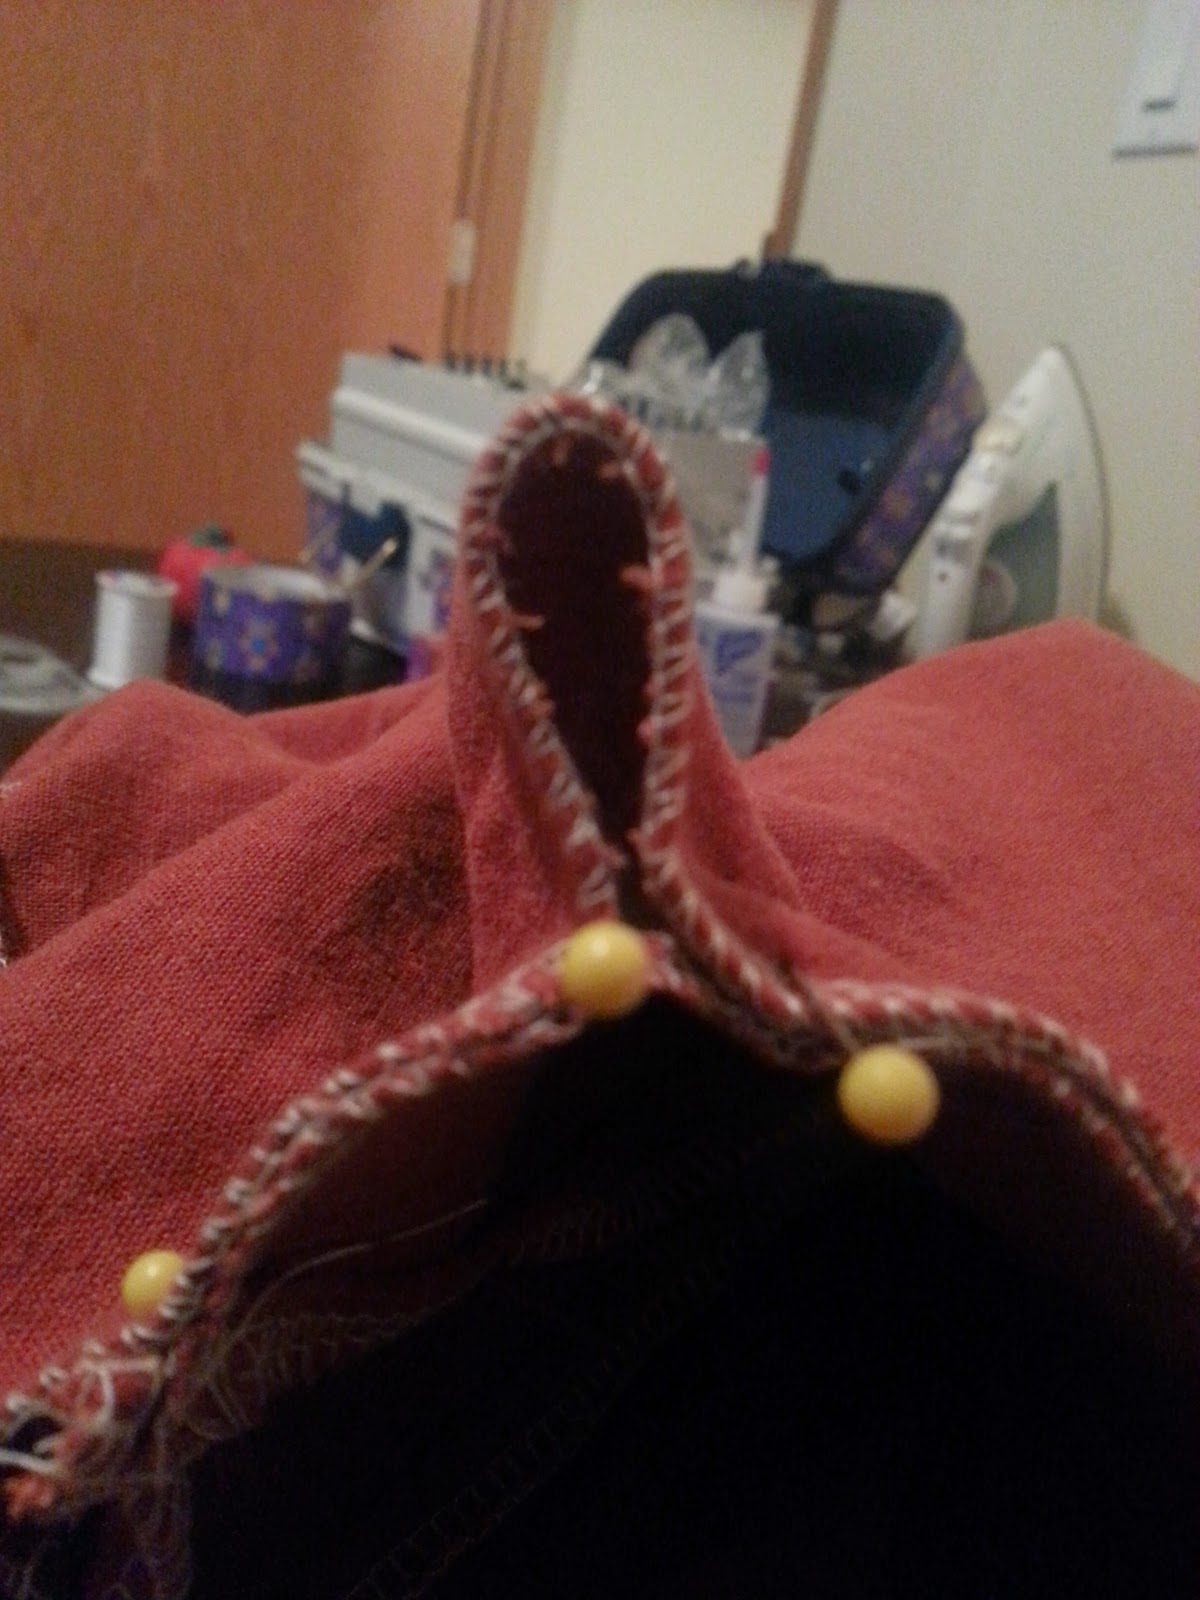
Next I cut out the "crotch gusset." I made this diamond shape by picking a length at random. For this project the size really isn't that important. It is going to get lost in the sea of fabric anyway. This is, I believe, 14 inches long. To make this I marked the top and bottom of the 14 inches. In the center of these two points I marked the halfway point. From the middle point I measured seven inches across the whole. Then I connected the dots and got this squished diamond.
Here is the diamond, all sergered and ready to go!
I had nearly no idea what I was doing. I have never made pants, shorts or the like, ever. That being said I did my research and I hit the internet. I found a few patterns online, read them, and took what I liked from each. Then I began the construction. I sewed down the front seam until I reached a point where I felt like I wanted to insert the gusset. I stitched it into the left, then the right.
Right here, here I got so confused. I had a sea of orange linen spilling across my sewing machine, table, and lap. So I stood up, grabbed my dress form and just pinned this up to look at it. It all made sense the second I did this. From here I took the point of the gusset that was no sewed in yet and pulled that to wear I wanted to attach it to the back of the pants. Just doing that formed the leg holes.
So I sewed it all up and got this!
One pair of pants, big enough for Bruce Banner. They are enormous!
Next I need to make the calf sections of the legs. Once again my half absent brain cut these the size of Andy's legs. Not the size to fit around his legs.
Here they are marked out. a little bit longer than his legs, but right on the mark around.
So to fix my too skinny legs I made another pair of gussets for the legs. Here you can see it on the right.
Okay. Now, I have my hulk shorts and a pair of calf sleeves and these two things are drastically different in size. One of the websites I read told me to "make them fit at this point." Which I hated. maybe if these were also a draw string and adjustable I could see it. But it was going to look ugly if I just hap-hazarded this together.
Here is my solution. I took the calf section and found the center point in the middle of the gusset along the inseam. I matched that up to the inseam on the hulk shorts.
Next I found the opposite point across the calf sleeve and pinned the point in, like above.
Then I found the same point on the hulk shorts. Here you can really see how much bigger the top is to the bottom.
Next I pinned those two points together.
Now I just kept doing this all around folding it in half again and again until I had eight bubbles!
Next I pinched in box pleats to flatten everything. Now I found putting in the pleats was easiest when done in one step. However I took pictures of the two steps for you!
It is a little difficult to tell here. The pin on the far left is one of the pins that make the eight bubbles from above. I flatten the top part to the center of the bottom part. Then I pinned it for the picture.
Next I just pressed the bubble formed in the picture above down. I adjust the pins to hold the pleat in place for the sewing and them I moved around the leg pleating that whole thing.
This is the pleat, it looks like a frog to me.
Here is the finished project. I put in a draw string at the top for the closure, but I think I *might* replace it with elastic. Andy couldn't care less about authenticity and all I care about is making event fun for him so he will want to go. He is still kind of on the fence about this weird thing I like to do.
What did you think? Was any part unclear?
Next I will show the leg wraps I made and the cloak I am working on for him. Also I have a bunch of stuff to showcase my sewing machine and cleaning and maintaining it.
Awesome! These are really cool!
ReplyDelete